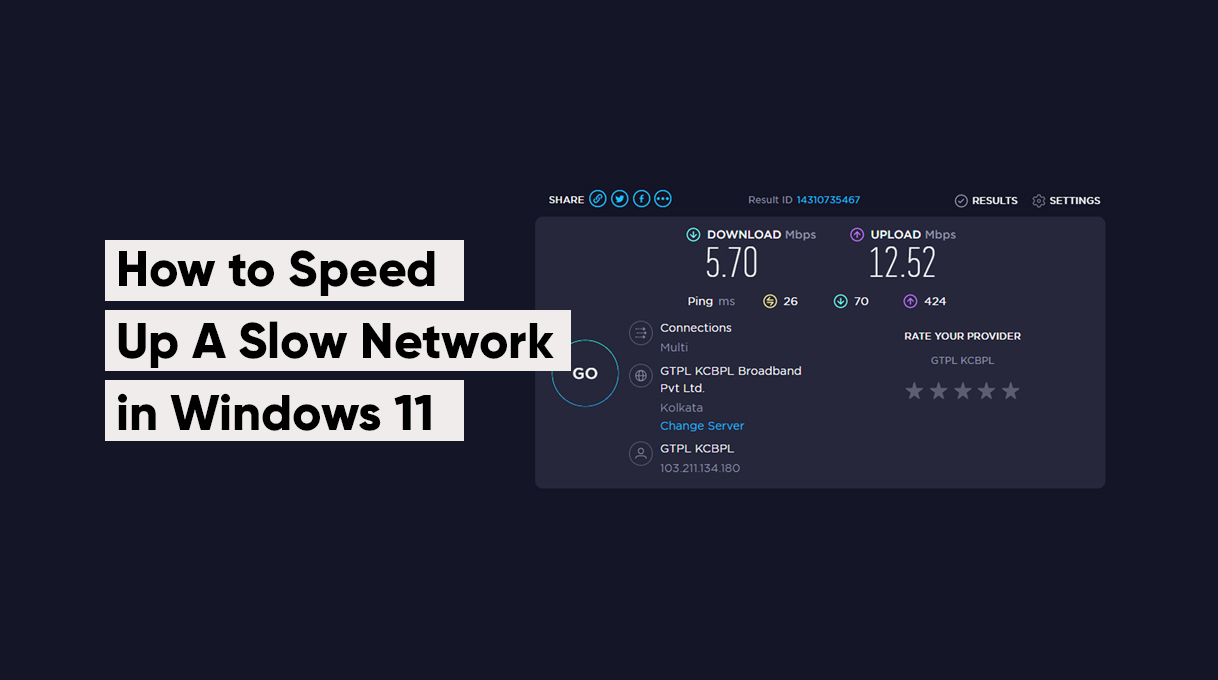
A slow network can be one of the most frustrating experiences when it comes to computer performance. There are several reasons a network may become slow, but in this article, we will discuss 7 solutions to help fix the problem in Windows 11.
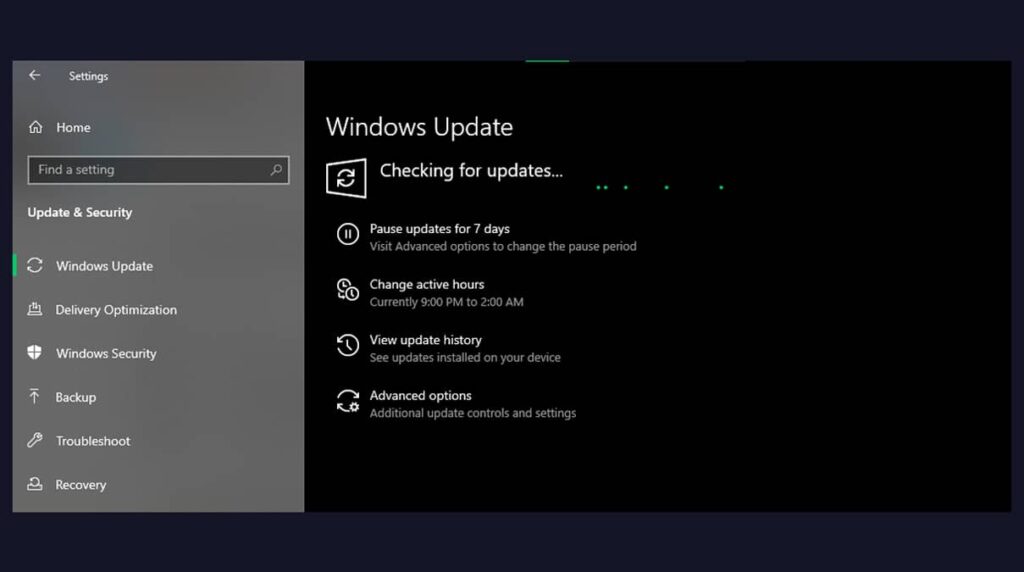
- Update to the Latest Windows Update
Outdated drivers can be a primary cause of a slow network in Windows 11. To fix this, you must ensure that your system has installed the latest updates.
Here’s how to do it:
Step 1: Press Win + I to open Settings.
Step 2: Go to Windows Update from the left panel.
Step 3: Click on Check for Updates.
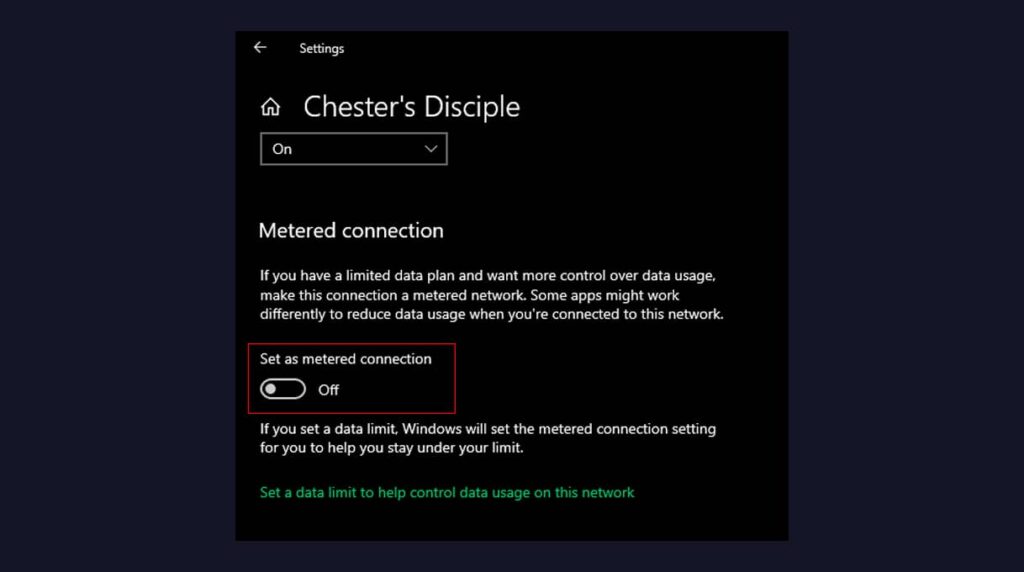
- Disable the Metered Connection
Metered connections limit the amount of data you can use, and if it is enabled, it can cause slow network performance. To disable it:
Step 1: Open Settings by pressing Win + I.
Step 2: Go to Network & Internet.
Step 3: Click on Wi-Fi.
Step 4: Select your network and open Properties.
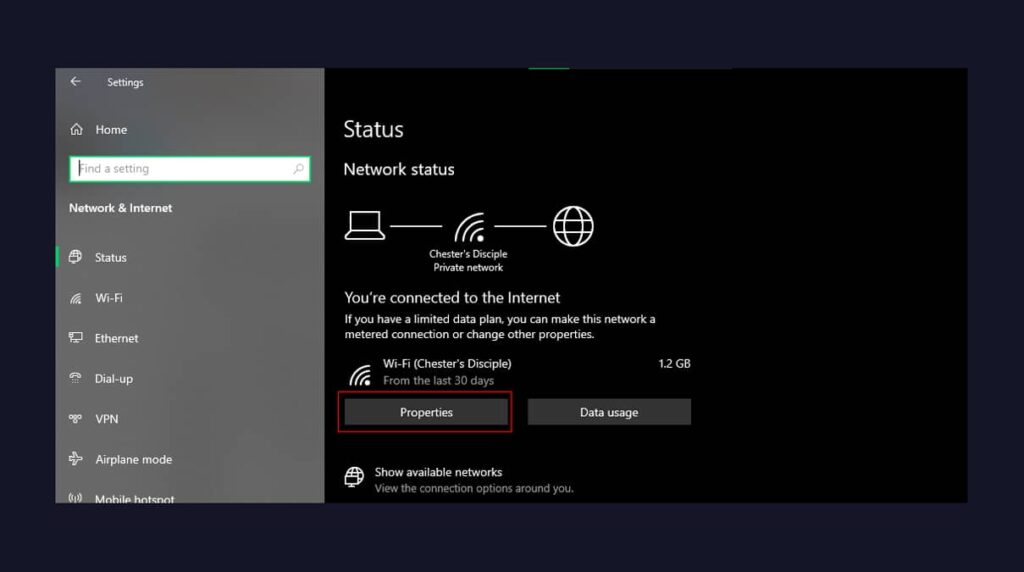
Step 5: Turn off the toggle under Metered Connection.
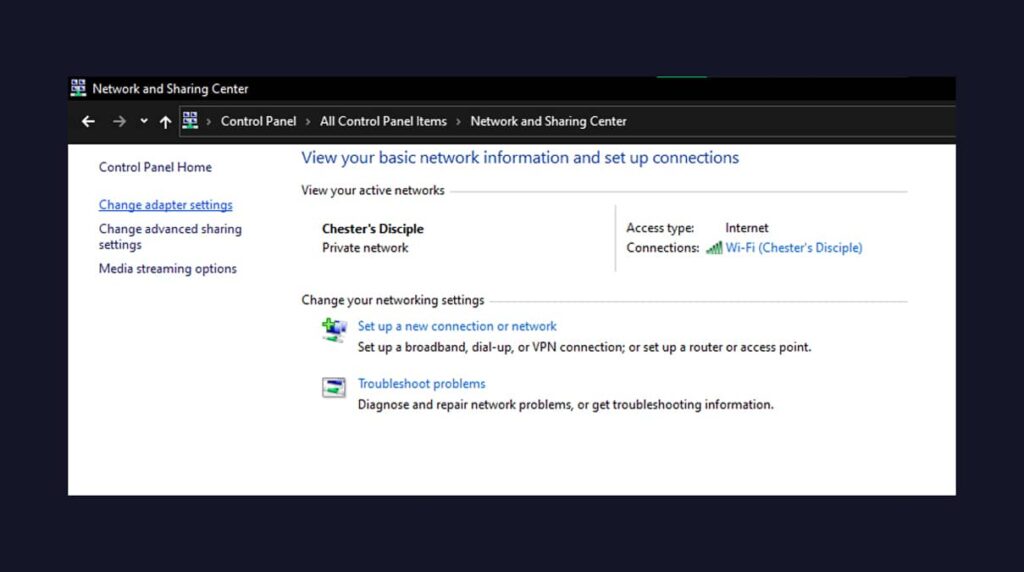
- Change the DNS server.
The default DNS settings on your system can sometimes lead to slow network performance. Changing them can help establish a faster network. Here’s how to do it:
Step 1: Open Control Panel.
Step 2: Go to Network and Internet.
Step 3: Go to Network and Sharing Center > Change Adapter Settings.
Step 4: Right-click on the connected network and select Properties.
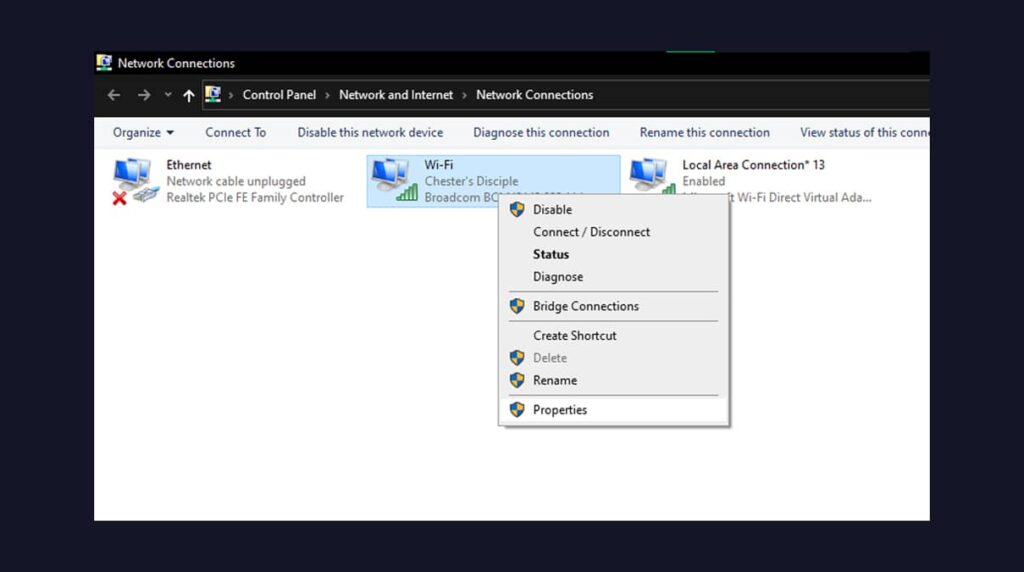
Step 5: Double-click on Internet Protocol Version 4 (TCP/IPv4).
Step 6: Choose to Use the following IP address.
Step 7: Enter 8.8.8.8 as the Preferred DNS server and 8.8.4.4 as the Alternative DNS server.
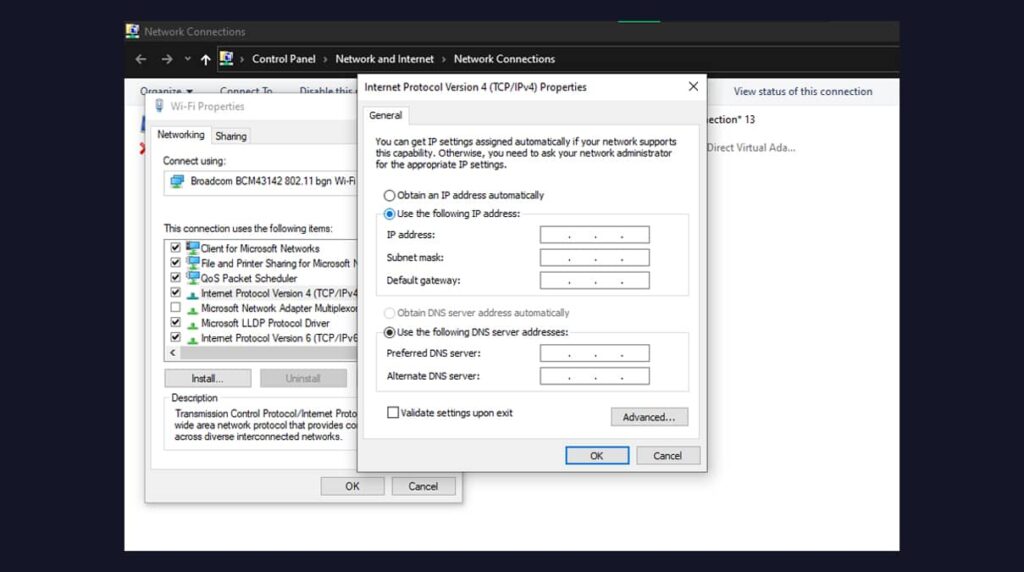
Step 8: Click OK.
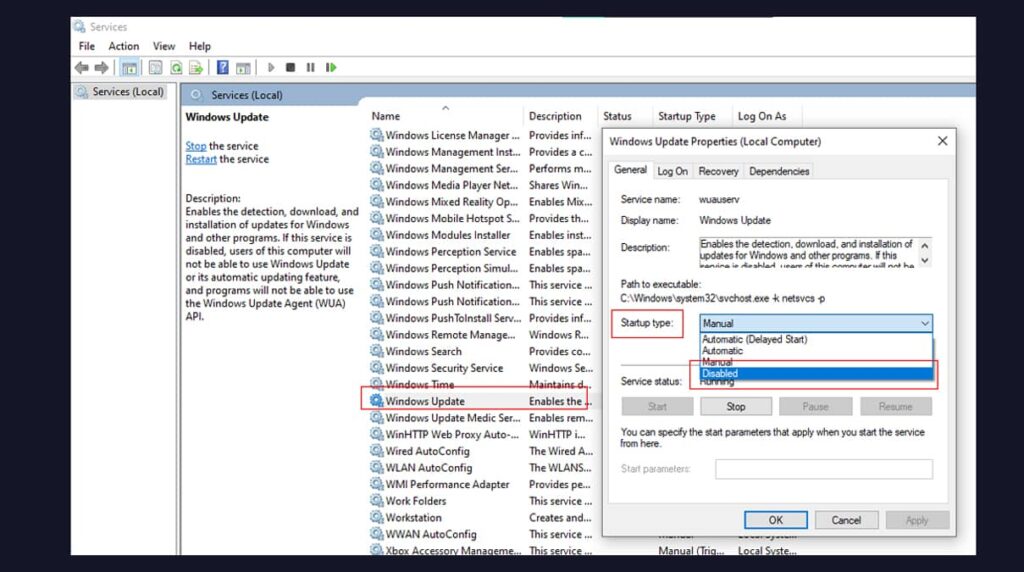
- Disable the Windows Update Services
While regular Windows Updates are essential, they can consume a lot of internet speed when running in the background. To resolve this, you can disable the Windows Update Services.
Step 1: Press Win + R, type services.msc, and hit Enter.
Step 2: Scroll down and find Windows Update.
Step 3: Right-click on it and select Properties.
Step 4: Under Startup type, select Disabled.
- Update Your Network Drivers
Outdated network drivers can cause slow network performance, so updating them is a good solution.
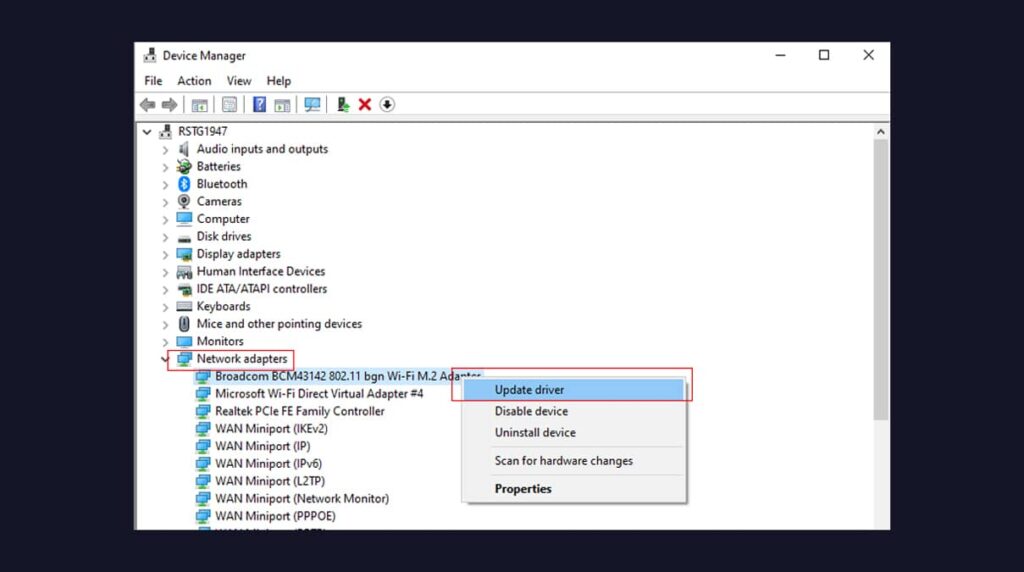
Step 1: Open Control Panel and select Device Manager.
Step 2: Find your Network Driver under Network Adapters.
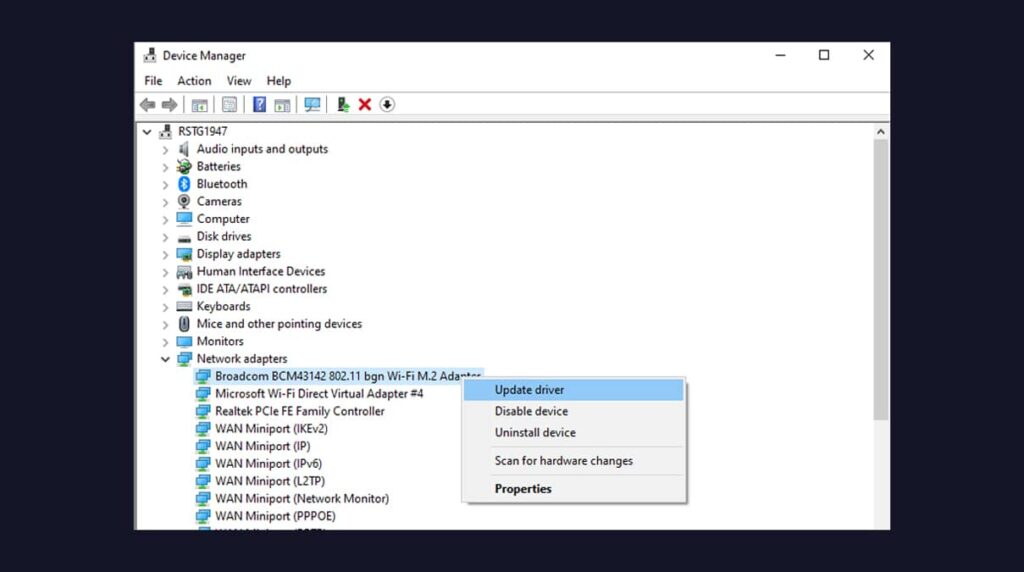
Step 3: Right-click on it and choose Update Driver.
Step 4: Click on Select automatically for drivers.
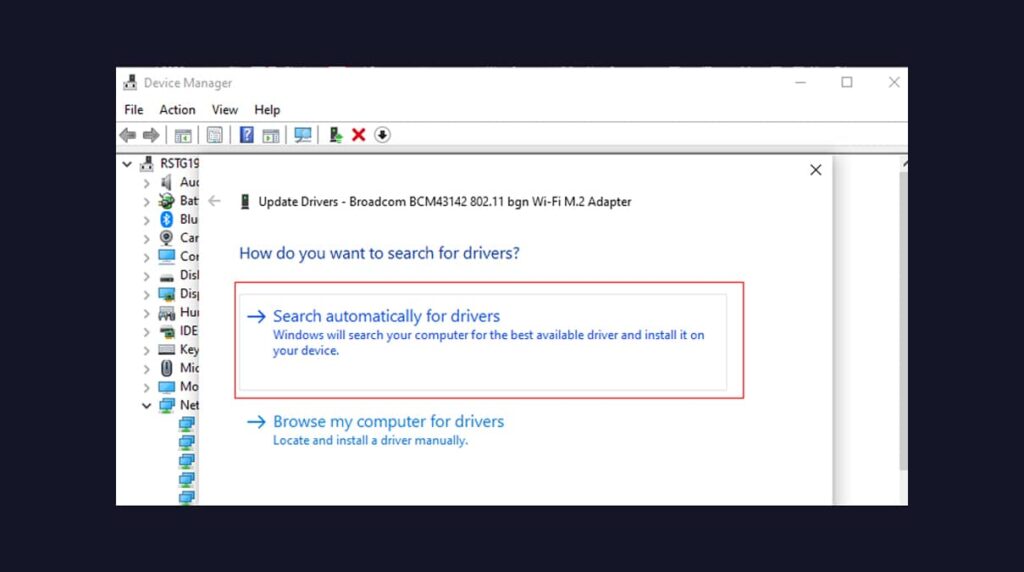
Step 5: The new driver will be downloaded and installed.
- Optimize Your Router’s Settings
Your router’s settings can have a significant impact on network performance. Changing the channel that transmits data can improve network performance. To change the settings, log in to your router’s web interface and make the necessary adjustments.
- Limit the Number of Connected Devices
Too many connected devices can slow down your network, so it’s important to disconnect any additional devices using it. Every connected device uses a portion of the available network resources, so limiting the number of connections will help improve network performance.
Conclusion
Following these steps can speed up a slow network in Windows 11. Updating Windows, disabling the metered connection, changing the DNS server, and disabling the Windows Update Services would certainly increase your internet speed. Which one worked for you? Let us know!